M5Stack Gray で esp32_ble_tracker で、Bluetooth Low Energy (BLE)のadvertise をscan して得られた アドレスと名前をとりあえず表示する YAML を作成してみたが、esp32_ble_tracker: を含めると Setting WiFi mode failed! となり WiFi が使えなくなる。
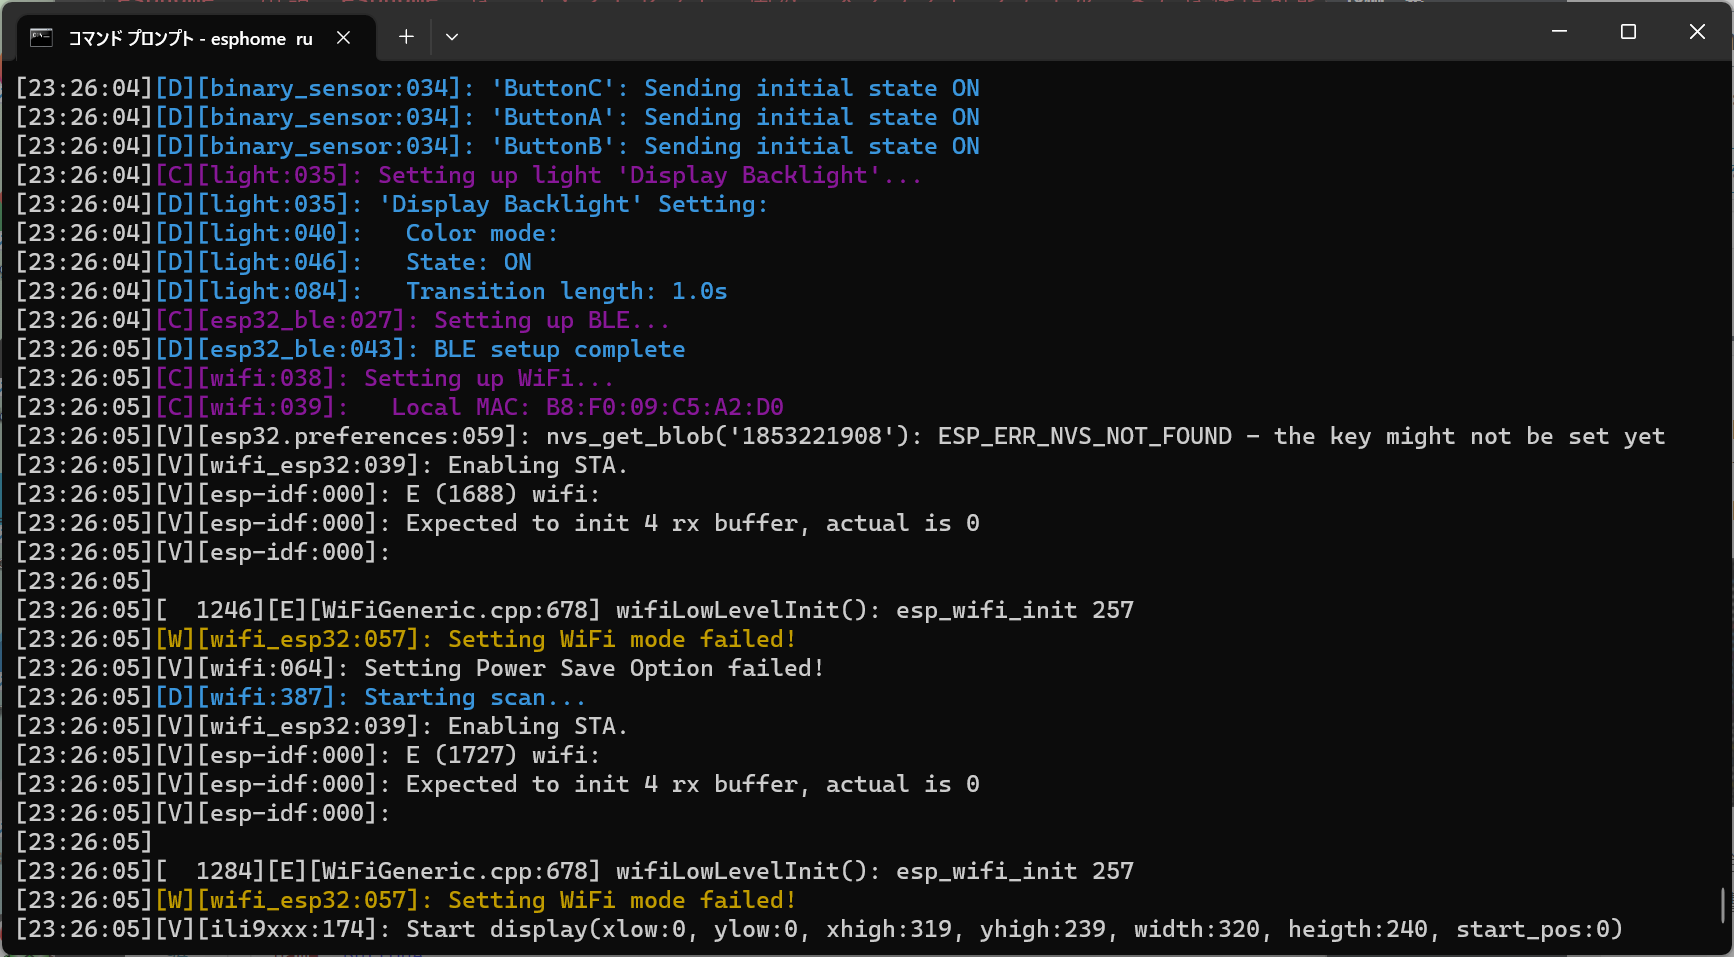
その場合でも esp32_ble_tracker 自体は動作しているため、電源ボタンでリセットしても、WiFiで書き込みができる Over-The-Air (OTA) safe mode に移行することはなく、同じことになり、OTAでの書き込みができなくなる。WiFiが使えない状態なので、WiFi経由でOTA safe mode に移行させることもできない。
OTAでのアップデートができないのは不便なので、M5Stack Gray の右ボタン(Button C)を押したら、強制的に OTA safe mode に移行するYAML設定ファイルを作成してみた。プログラムから強制的に OTA safe mode でリブートするための関数を調べるのに手間取ったので、備忘録として残しておく。
YAML設定ファイル
|
1 2 3 4 5 6 7 8 9 10 11 12 13 14 15 16 17 18 19 20 21 22 23 24 25 26 27 28 29 30 31 32 33 34 35 36 37 38 39 40 41 42 43 44 45 46 47 48 49 50 51 52 53 54 55 56 57 58 59 60 61 62 63 64 65 66 67 68 69 70 71 72 73 74 75 76 77 78 79 80 81 82 83 84 85 86 87 88 89 90 91 92 93 94 95 96 97 98 99 100 101 102 103 104 105 106 107 108 109 110 111 112 113 114 115 116 117 118 119 120 121 122 123 124 125 126 127 128 129 130 131 |
substitutions: device_name: m5stack_grey_with_ILI9342C _friendly_name: "ESPHome Web c5a2d0 Grey (ILI9342C)" esphome: name: esphome-web-c5a2d0 friendly_name: $_friendly_name esp32: board: m5stack-grey # M5Stack Grey framework: type: arduino # Enable logging logger: level: VERBOSE # Remove this line if normal use # Enable Home Assistant API api: encryption: key: "sASMDEVYpJ1rRw5bTmbv0U7iB6eZfs4Ct9osYp5PFfo=" # Enable OTA (Over-The-Air) ota: id: my_ota # WiFi Access Point wifi: ssid: !secret wifi_ssid password: !secret wifi_password # Enable fallback hotspot (captive portal) in case wifi connection fails ap: ssid: "Esphome-Web-C5A2D0" password: "fPKaK7CujFeA" # Fallback mechanism when WiFi Access Point cannot be connected to captive_portal: # SPI setting (needed for display) spi: # M5Stack Grey clk_pin: GPIO18 mosi_pin: GPIO23 miso_pin: GPIO19 # Fonts (needed for text display) font: - file: "gfonts://Roboto" # Google Fonts id: roboto24 size: 24 # Dimmable led (PWM) for display backlight output: # M5Stack Grey - platform: ledc pin: GPIO32 id: gpio_32_backlight_pwm # Display backlight light: # M5Stack Grey - platform: monochromatic output: gpio_32_backlight_pwm name: "Display Backlight" id: back_light restore_mode: ALWAYS_ON # Display for M5Stack Grey (ILI9342C) display: - platform: ili9xxx model: M5STACK # M5Stack Grey cs_pin: GPIO14 dc_pin: GPIO27 reset_pin: GPIO33 #rotation: 0 id: basic_display # update_interval: 2s lambda: |- if (!id(ble_data_map).empty()) { int i = 0; for (const auto &kv : id(ble_data_map)) { it.printf(0, i * 25, id(roboto24), "%s: %s", kv.first.c_str(), kv.second.c_str()); i++; } } else { it.print(0, 0, id(roboto24), "No Data"); } # M5Stack Basic Buttons binary_sensor: # M5Stack Grey - platform: gpio pin: number: GPIO39 inverted: false name: ButtonA on_press: then: - esp32_ble_tracker.start_scan - platform: gpio pin: number: GPIO38 inverted: false name: ButtonB on_press: then: - esp32_ble_tracker.stop_scan - platform: gpio pin: number: GPIO37 inverted: false name: ButtonC on_press: then: - lambda: |- id(my_ota).set_safe_mode_pending(true); // set next boot to safe mode App.safe_reboot(); // OTA safe boot # BLE Tracker esp32_ble_tracker: scan_parameters: continuous: false on_ble_advertise: then: - lambda: |- id(ble_data_map)[x.address_str()] = x.get_name(); # Global variable globals: - id: ble_data_map type: std::map<std::string, std::string> |
プログラムの動作
BLE scan
正しくWiFiが動作しないので意味がないが、上記の設定ファイルでは、左ボタン(Button A)を押すと esp32_ble_tracker.start_scan によってBLE の scan を開始し、右ボタン (Button B)を押すと esp32_ble_tracker.stop_scan によって scan を停止する。
次のコードで BLEの advertise を受信したら、 ble_data_map に addressとnameを蓄積する。
|
1 2 3 4 |
on_ble_advertise: then: - lambda: |- id(ble_data_map)[x.address_str()] = x.get_name(); |
ble_data_map は std::map<std::string, std::string> 型のグローバル変数である。
|
1 2 3 |
globals: - id: ble_data_map type: std::map<std::string, std::string> |
ディスプレイへの表示は、display: の lambda で ble_data_map から要素を順に取り出してaddr と name を表示する。
|
1 2 3 4 5 6 7 8 9 10 |
lambda: |- if (!id(ble_data_map).empty()) { int i = 0; for (const auto &kv : id(ble_data_map)) { it.printf(0, i * 25, id(roboto24), "%s: %s", kv.first.c_str(), kv.second.c_str()); i++; } } else { it.print(0, 0, id(roboto24), "No Data"); } |
OTA safe mode
先述のように Button C を押すと次のコードで OTA safe mode になるようにreboot する。set_safe_mode_pending(true)で次のブートでsafe mode になるよう設定する。App.safe_reboot()は、safe mode にすべきかのフラグに応じて、safe mode もしくは通常モードでリブートする。
|
1 2 |
id(my_ota).set_safe_mode_pending(true); // set next boot to safe mode App.safe_reboot(); // OTA safe boot |
このコードを使う場合には、 ota: で id を定義する必要がある。
|
1 2 3 |
# Enable OTA (Over-The-Air) ota: id: my_ota |
上記コードの部分が実行された際に、USB シリアル経由でログをとると、次のように Over-The-Air で待ちに入ることがわかる。
