ESP32から Amazon Web Service (AWS) IoT に MQTT over WebSocketでつなぐことを試した。Arduinoのライブラリの使い方でうまくいかない場合の原因調査に時間がかかった。分かってみればArduinoのプログラミングモデルを正しく理解していなかっただけであるが、備忘録として残しておく。
目次
開発環境
開発につかった環境、ライブラリなどは以下の通り。
ハードウェア
- MH-ET Live Minikit ESP32
- 他の開発ボードでも同様だと思う。
プログラム開発環境
- Windows 10
- PlatformIO IDE for VSCode
- PlatformIO IDE for VSCode のインストールについては、PlatformIO IDE for VSCode でESP32のプログラム開発 を参照のこと
- ライブラリインストールについては、PlatformIO IDE for VSCode へのArduinoライブラリのインストール を参照のこと
ライブラリ
AWS MQTT over WebSocket をライブラリとして使った。AWS SDK for Arduinoライブラリおよび arduinoWebSockets ライブラリが必要である。
また、MQTT ClientライブラリとしてPubSubClientライブラリもしくはEclipse Paho が必要である。
WiFiManagerも利用している。
AWS MQTT over WebSocket
https://github.com/odelot/aws-mqtt-websockets
AWS SDK for Arduino
https://github.com/odelot/aws-sdk-arduino
(2018年8月18日追記)
ESP32で動作させるためには、一部コードの変更が必要である。
修正をしたコードをGitHubの次に置いた。
https://github.com/kunsen-an/aws-sdk-arduino
下記のライブラリの依存関係では aws-sdk-arduino-ESP32 となっている。PlatformIO のプロジェクトの下にあるlibの中にcloneして利用することができる。
WebSocket
https://github.com/Links2004/arduinoWebSockets
WifiManager
プログラムにWiFiの情報を埋め込むのを避けるためにWifiManager を使う。DNSServerやWebServerも必要になる。
(2018年8月18日追記)
ESP32のためには、development branch のコードを使う必要がある。
https://github.com/tzapu/WiFiManager/tree/development
もちろん、WiFiManagerを利用することは必須ではない。https://github.com/odelot/aws-mqtt-websockets/tree/master/examples のサンプルプログラムのように WifiManagerを使わなくてもプログラムを作成できる。
MQTT Clientライブラリ
PubSubClient
A client library for the Arduino Ethernet Shield that provides support for MQTT.
https://github.com/knolleary/pubsubclient
http://pubsubclient.knolleary.net/
Eclipse Paho
https://projects.eclipse.org/projects/technology.paho
https://www.eclipse.org/downloads/download.php?file=/paho/arduino_1.0.0.zip
PlatformIO IDE for VSCode で PIO Homeのライブラリマネージャからインストールできる。
ライブラリの依存関係
ライブラリの依存関係は以下の通り。PubSubClientもPahoも含んでいる。
[code]
|
1 2 3 4 5 6 7 8 9 10 11 12 13 14 15 16 17 18 19 20 21 22 23 24 25 26 27 28 29 30 31 32 33 34 35 36 37 38 39 40 |
Dependency Graph |-- <WebSockets> 2.1.0 | |-- <SPI> 1.0 | |-- <WiFiClientSecure> 1.0 | | |-- <WiFi> 1.0 | |-- <WiFi> 1.0 |-- <aws-mqtt-websockets> | |-- <WebSockets> 2.1.0 | | |-- <SPI> 1.0 | | |-- <WiFiClientSecure> 1.0 | | | |-- <WiFi> 1.0 | | |-- <WiFi> 1.0 | |-- <aws-sdk-arduino-ESP32> | | |-- <WiFi> 1.0 | | |-- <WiFiClientSecure> 1.0 | | | |-- <WiFi> 1.0 |-- <WebServer> 1.0 | |-- <FS> 1.0 | |-- <WiFi> 1.0 |-- <WiFi> 1.0 |-- <WifiManager> 0.12 | |-- <DNSServer> 1.1.0 | | |-- <WiFi> 1.0 | |-- <WebServer> 1.0 | | |-- <FS> 1.0 | | |-- <WiFi> 1.0 | |-- <ESPmDNS> 1.0 | | |-- <WiFi> 1.0 | |-- <WiFi> 1.0 |-- <SPI> 1.0 |-- <Paho> 1.0.0 | |-- <SPI> 1.0 | |-- <WiFi> 1.0 |-- <PubSubClient> 2.6 |-- <DNSServer> 1.1.0 | |-- <WiFi> 1.0 |-- <aws-sdk-arduino-ESP32> | |-- <WiFi> 1.0 | |-- <WiFiClientSecure> 1.0 | | |-- <WiFi> 1.0 |
単純なプログラムでのテスト
ESP32のプログラム
以下のプログラムを用いて動作確認を行った。WifiManagerを使ってWiFiに接続するようにしている。
40行目から45行目は利用するAWS IoTに応じて変更が必要である。MQTT でAWS IoT にアクセスするための設定 に簡単な設定方法について示した。
プログラムは起動直後に、$aws/things/your-device/shadow/update にメッセージを送信する。$aws/things/your-device/shadow/control にメッセージを受信するとそれをシリアルに表示すると共に、起動直後と同じメッセージを $aws/things/your-device/shadow/update に送信する。
|
1 2 3 4 5 6 7 8 9 10 11 12 13 14 15 16 17 18 19 20 21 22 23 24 25 26 27 28 29 30 31 32 33 34 35 36 37 38 39 40 41 42 43 44 45 46 47 48 49 50 51 52 53 54 55 56 57 58 59 60 61 62 63 64 65 66 67 68 69 70 71 72 73 74 75 76 77 78 79 80 81 82 83 84 85 86 87 88 89 90 91 92 93 94 95 96 97 98 99 100 101 102 103 104 105 106 107 108 109 110 111 112 113 114 115 116 117 118 119 120 121 122 123 124 125 126 127 128 129 130 131 132 133 134 135 136 137 138 139 140 141 142 143 144 145 146 147 148 149 150 151 152 153 154 155 156 157 158 159 160 161 162 163 164 165 166 167 168 169 170 171 172 173 174 175 176 177 178 179 180 181 182 183 184 185 186 187 188 189 190 191 192 193 194 195 196 197 198 199 200 201 202 203 204 205 206 207 208 209 210 211 212 213 214 215 216 217 218 219 220 221 222 223 224 225 226 227 228 229 230 231 232 233 234 235 236 237 238 239 240 241 242 243 244 245 246 247 248 249 250 251 252 253 254 255 256 257 258 259 260 261 262 263 264 265 266 267 268 269 270 271 272 273 274 275 276 277 278 |
// This code is based on https://github.com/odelot/aws-mqtt-websockets/tree/master/examples #define USE_PUBSUB 1 // use PubSubClient library https://github.com/knolleary/pubsubclient //#define USE_PAHO 1 // use Eclipse Paho library https://projects.eclipse.org/projects/technology.paho //#define LONG_DELAY 1 // set this flag to test long delay effect //#define NO_LIBRARY_CALLBACK 1 // set this flag to test effect of library callback #include <Arduino.h> #include <Stream.h> #include <WiFi.h> #include <DNSServer.h> #include <WebServer.h> // WiFiManager #include <WiFiManager.h> // https://github.com/tzapu/WiFiManager //AWS #include "sha256.h" #include "Utils.h" //WEBSockets #include <WebSocketsClient.h> #if defined(USE_PUBSUB) //MQTT PUBSUBCLIENT LIB #include <PubSubClient.h> #elif defined(USE_PAHO) //MQTT PAHO #include <SPI.h> #include <IPStack.h> #include <Countdown.h> #include <MQTTClient.h> #endif //AWS MQTT Websocket #include "Client.h" #include "AWSWebSocketClient.h" #include "CircularByteBuffer.h" // AWS settings #include "myAWSus-east2.h" char aws_region[] = MY_AWS_REGION; char aws_endpoint[] = MY_AWS_ENDPOINT; char aws_key[] = MY_AWS_IAM_KEY; char aws_secret[] = MY_AWS_IAM_SECRET_KEY; const char *aws_topic = "$aws/things/your-device/shadow/update"; const char *aws_control = "$aws/things/your-device/shadow/control"; int port = 443; //MQTT config const int maxMQTTpackageSize = 512; const int maxMQTTMessageHandlers = 1; //ESP8266WiFiMulti WiFiMulti; WiFiManager wifiManager; AWSWebSocketClient awsWSclient(1000); #if defined(USE_PUBSUB) //MQTT PUBSUBCLIENT LIB PubSubClient client(awsWSclient); #elif defined(USE_PAHO) IPStack ipstack(awsWSclient); MQTT::Client<IPStack, Countdown, maxMQTTpackageSize, maxMQTTMessageHandlers> client(ipstack); #endif //# of connections long connection = 0; //generate random mqtt clientID char *generateClientID() { char *cID = new char[23](); for (int i = 0; i < 22; i += 1) cID[i] = (char)random(1, 256); return cID; } //count messages arrived int arrivedcount = 0; extern void sendmessage(); #if defined(USE_PUBSUB) //callback to handle mqtt messages void callback(char *topic, byte *payload, unsigned int length) { Serial.print("Message arrived ["); Serial.print(topic); Serial.print("] "); for (int i = 0; i < length; i++) { Serial.print((char)payload[i]); } Serial.println(); // send back message sendmessage(); } #elif defined(USE_PAHO) //callback to handle mqtt messages void messageArrived(MQTT::MessageData &md) { MQTT::Message &message = md.message; Serial.print("Message "); Serial.print(++arrivedcount); Serial.print(" arrived: qos "); Serial.print(message.qos); Serial.print(", retained "); Serial.print(message.retained); Serial.print(", dup "); Serial.print(message.dup); Serial.print(", packetid "); Serial.println(message.id); Serial.print("Payload "); char *msg = new char[message.payloadlen + 1](); memcpy(msg, message.payload, message.payloadlen); Serial.println(msg); delete msg; // send back message sendmessage(); } #endif //connects to websocket layer and mqtt layer bool connect() { #if defined(USE_PUBSUB) if (client.connected()) #elif defined(USE_PAHO) if (client.isConnected()) #endif { client.disconnect(); } //delay is not necessary... it just help us to get a "trustful" heap space value delay(1000); Serial.print(millis()); Serial.print(" - conn: "); Serial.print(++connection); Serial.print(" - ("); Serial.print(ESP.getFreeHeap()); Serial.println(")"); int rc; #if defined(USE_PUBSUB) client.setServer(aws_endpoint, port); #elif defined(USE_PAHO) rc = ipstack.connect(aws_endpoint, port); if (rc != 1) { Serial.println("error connection to the websocket server"); return false; } Serial.println("websocket layer connected"); #endif //creating random client id char *clientID = generateClientID(); #if defined(USE_PUBSUB) rc = client.connect(clientID); delete[] clientID; if (rc == 0) { Serial.print("error connection to MQTT server: "); Serial.print(client.state()); return false; } #elif defined(USE_PAHO) Serial.println("MQTT connecting"); MQTTPacket_connectData data = MQTTPacket_connectData_initializer; data.MQTTVersion = 4; data.clientID.cstring = clientID; rc = client.connect(data); delete[] clientID; if (rc != 0) { Serial.print("error connection to MQTT server: "); Serial.println(rc); return false; } #endif Serial.println("MQTT connected"); return true; } //subscribe to a mqtt topic void subscribe() { #if defined(USE_PUBSUB) client.setCallback(callback); client.subscribe(aws_control); #elif defined(USE_PAHO) //subscript to a topic int rc = client.subscribe(aws_control, MQTT::QOS0, messageArrived); if (rc != 0) { Serial.print("rc from MQTT subscribe is "); Serial.println(rc); return; } #endif //subscript to a topic Serial.println("MQTT subscribed"); } //send a message to a mqtt topic void sendmessage() { //send a message char buf[100]; strcpy(buf, "{\"state\":{\"reported\":{\"on\": false}, \"desired\":{\"on\": false}}}"); #if defined(USE_PUBSUB) int rc = client.publish(aws_topic, buf); #elif defined(USE_PAHO) MQTT::Message message; message.qos = MQTT::QOS0; message.retained = false; message.dup = false; message.payload = (void *)buf; message.payloadlen = strlen(buf); int rc = client.publish(aws_topic, message); #endif } void setup() { // wifi_set_sleep_type(NONE_SLEEP_T); Serial.begin(115200); delay(2000); // Serial.setDebugOutput(1); // first parameter is name of access point, second is the password wifiManager.autoConnect(); Serial.println("\nWiFi connected"); //fill AWS parameters awsWSclient.setAWSRegion(aws_region); awsWSclient.setAWSDomain(aws_endpoint); awsWSclient.setAWSKeyID(aws_key); awsWSclient.setAWSSecretKey(aws_secret); awsWSclient.setUseSSL(true); if (connect()) { subscribe(); sendmessage(); } } void loop() { //keep the mqtt up and running if (awsWSclient.connected()) { #if !defined(NO_LIBRARY_CALLBACK) #if defined(USE_PUBSUB) client.loop(); #elif defined(USE_PAHO) client.yield(50); #endif #endif } else { //handle reconnection if (connect()) { subscribe(); } } #if defined(LONG_DELAY) delay(15 * 1000); #endif } |
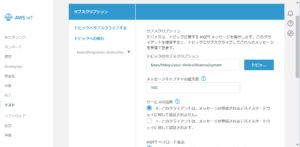
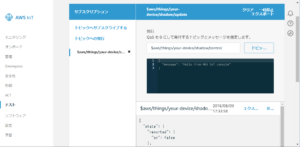
AWS IoT Core のページから「テスト」を選び、「トピックへサブスクライブする」で $aws/things/your-device/shadow/update を subscribe する。
この後で、ESP32のプログラムを起動すると、メッセージがAWS IoTで受信されるはず。
AWS MQTT over WebSocket 利用の際の注意点
以下の部分の client.loop() もしくは client.yield() が頻繁に呼び出されるようにしておく必要がある。
|
1 2 3 4 5 6 7 8 9 10 11 |
//keep the mqtt up and running if (awsWSclient.connected()) { #if defined(NO_LIBRARY_CALLBACK) #if defined(USE_PUBSUB) client.loop(); #elif defined(USE_PAHO) client.yield(50); #endif #endif } |
また、aws-mqtt-websockets の内部で待ちがある場合に loop() 関数が呼び出されている箇所がある。
loop()に時間がかかり戻ってこないとそのためにタイムアウトになるなどして WebSocketの接続が切れるなど問題を生じる場合がある。たとえば、loop内で delayなどを使って時間がかかるようにしていると問題を生じる。
試していて、これら問題に気がつくまで、メッセージが送れなかったり、コネクションの切断が頻繁に起きたりしてうまく動作しなかった。
ライブラリに附属しているexampleではloopが短時間で終わるようになっているので問題は生じない。
MQTT接続の切断など
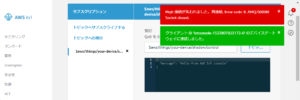
上記のプログラム例で LONG_DELAY と NO_LIBRARY_CALLBACK を定義すると、しばらく使っているとAWS IoT のMQTT接続が切断されることがある。
以下はAWS IoTのテストで、$aws/things/your-device/shadow/update をsubscribeしてあった際に出た通知。
また、 LONG_DELAY を定義して (NO_LIBRARY_CALLBACK は定義しないで) PubSubClientを使うとシリアルに以下のような出力がされ、切断と再接続が繰り返されていることがわかる。このような場合には、受信すべきメッセージが失われることになる。
|
1 2 3 4 5 6 7 8 9 10 11 12 13 14 15 16 17 18 19 20 21 22 23 24 25 |
WiFi connected 7698 - conn: 1 - (228880) [E][WiFiClient.cpp:120] setSocketOption(): 1006 : 9 MQTT connected MQTT subscribed AWSWebSocketClient::stop() [E][WiFiClient.cpp:120] setSocketOption(): 1006 : 9 88993 - conn: 2 - (226760) [E][WiFiClient.cpp:120] setSocketOption(): 1006 : 9 MQTT connected MQTT subscribed AWSWebSocketClient::stop() [E][WiFiClient.cpp:120] setSocketOption(): 1006 : 9 169178 - conn: 3 - (226344) [E][WiFiClient.cpp:120] setSocketOption(): 1006 : 9 MQTT connected MQTT subscribed AWSWebSocketClient::stop() [E][WiFiClient.cpp:120] setSocketOption(): 1006 : 9 249096 - conn: 4 - (226144) [E][WiFiClient.cpp:120] setSocketOption(): 1006 : 9 MQTT connected MQTT subscribed AWSWebSocketClient::stop() [E][WiFiClient.cpp:120] setSocketOption(): 1006 : 9 |
まとめ
Arduino スタイルのプログラミングモデルでは当たり前といえば当たり前であるが、ライブラリはマルチスレッドなどで並行動作するわけではない。このために以下のことに気をつける必要がある。
- PubSubClientライブラリの loop() もしくはPahoライブラリのyield() が頻繁に呼び出されるようにしておく
- Arduinoプログラム本体の loop() は短時間で終了するようにしておく


